|
After you have finished installing Client Track on your computer, follow the instructions below to set up Client Track and begin the 30-day free trial period. |
|
|
|
|
|
Client Track Setup |
|
|
|
|
|
Step 1 |
|
|
|
|
|
Double-click the Client Track 5.0 icon. |
|
|
|
|
|
Step 2 |
|
|
|
|
|
 |
|
|
|
|
|
Select type of edition you would like to try and click
Try Client Track For Free (see above). |
|
|
............................................................................................................................................................................. |
|
|
|
|
|
Note : You can try all 3 editions of Client Track during
the 30-day free trial period. |
|
|
|
|
|
If you would like to continue using Client Track beyond
30-day period, you must purchase Client Track either through our Order page or by
Telephone. Keep your Product Number handy when asked for (see above).
When the order has been successfully received, a member of our Sales Department will contact you by telephone or email with
your Registration Code. Insert your Registration Code inside the 3 white boxes and
click Register Now (see above). |
|
|
|
|
|
Step 3 |
|
|
|
|
|
 |
|
|
|
|
|
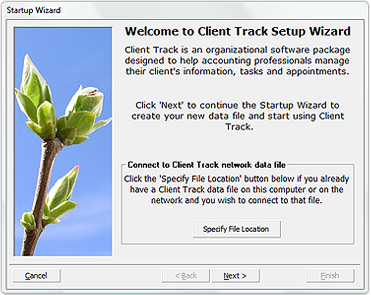
Click Next. Client Track will automatically create a Data File for you. |
|
|
|
|
|
Note : If you have an existing data file, click
Specify File Location
and link Client Track to that data file. For more information on Data File, click here. |
|
|
|
|
|
Step 4 |
|
|
|
|
|
 |
|
|
|
|
|
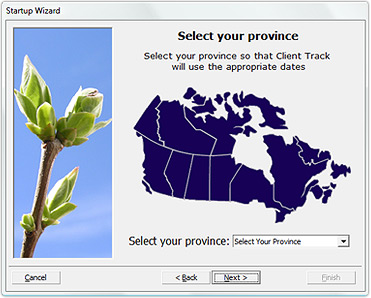
Select Province and then click Next. |
|
|
|
|
|
Step 5 |
|
|
|
|
|
 |
|
|
|
|
|
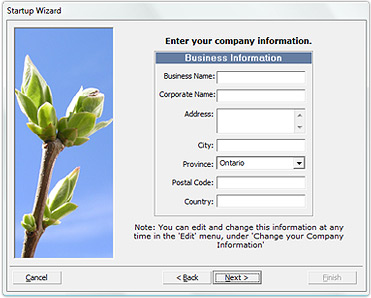
Fill in all your Business Information and then click Next. |
|
|
|
|
|
Step 6 |
|
|
|
|
|
 |
|
|
|
|
|
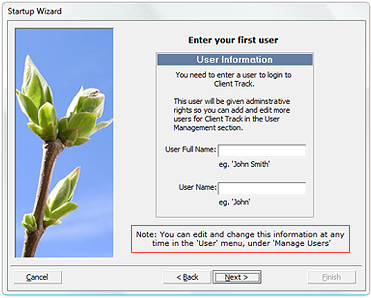
Fill in your User Information and then click Next. Your User Name will appear on the logon screen from drop-down menu everytime you start up Client Track. |
|
|
|
|
|
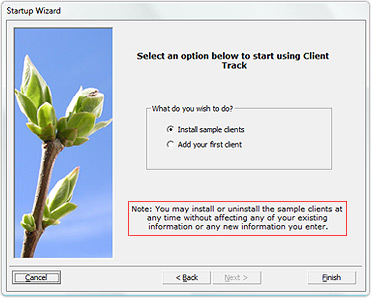
Step 7 |
|
|
|
|
|
 |
|
|
|
|
|
Select Install Sample Clients and click Finish. |
|
|
|
|
|
Step 8 |
|
|
|
|
|
After you purchase Client Track, you can import your clients by following these two steps : |
|
|
|
|
|
|
|

