|
Before importing clients into Client Track, you must export your clients first.
Choose type of software from the left sidebar menu and follow the step-by-step tutorial
on how to export your clients and be ready to import into Client Track. |
|
|
|
|
|
Exporting your Clients from Act! into text/csv file. |
|
|
|
|
|
Step 1 |
|
|
|
|
|
 |
|
|
|
|
|
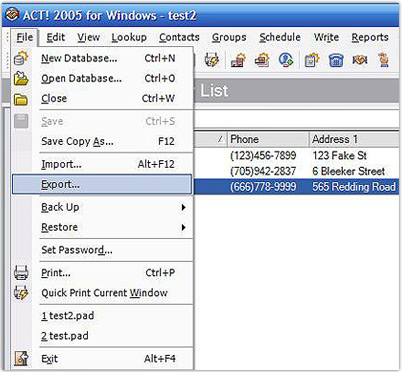
Fig.1. File Menu |
|
|
|
|
|
 |
|
From menu, go to
File > Export
(Fig.1). |
|
|
|
|
|
|
|
Step 2 |
|
|
|
|
|
 |
|
|
|
|
|
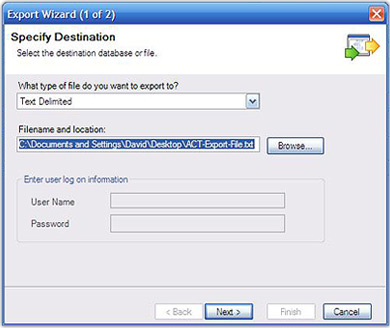
Fig.2. Specify Destination |
|
|
|
|
|
1. Select Text Delimited from drop-down list to export file to (Fig.2).
2. Click Browse and save export text file and click Next. |
|
|
|
|
|
Step 3 |
|
|
|
|
|
 |
|
|
|
|
|
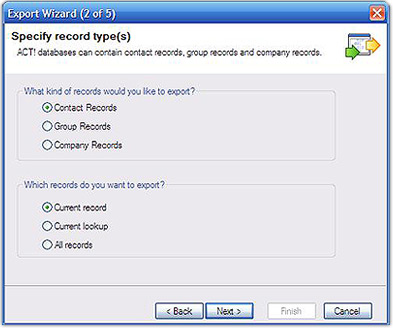
Fig.3. Specify Record Type(s) |
|
|
|
|
|
Choose type of records you would like to include in export file and then click Next (Fig.3). |
|
|
|
|
|
Step 4 |
|
|
|
|
|
 |
|
|
|
|
|
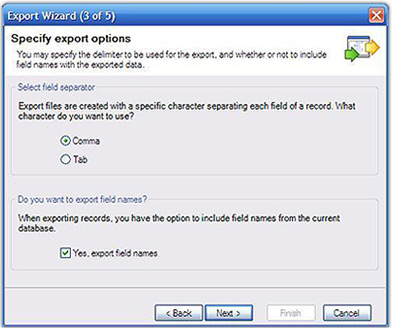
Fig.4. Specify Export Options |
|
|
|
|
|
1. Select Comma as field seperator and check off
Yes, export field names (Fig.4).
2. Click Next. |
|
|
|
|
|
Step 5 |
|
|
|
|
|
 |
|
|
|
|
|
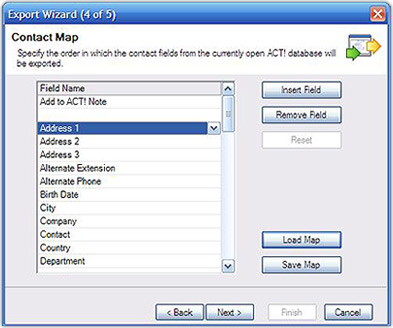
Fig.5. Contact Map |
|
|
|
|
|
Choose order of fields from list to export and then click Next (Fig.5). |
|
|
|
|
|
Note : The order of the export fields do not matter because you can map the fields in
Client Track. |
|
|
|
|
|
Step 6 |
|
|
|
|
|
 |
|
|
|
|
|
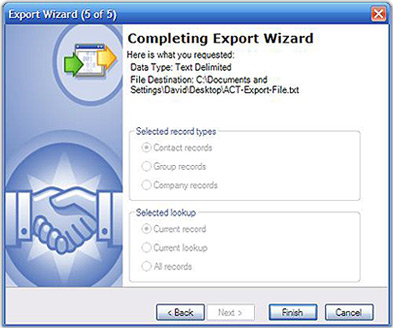
Fig.6. Completing Export Wizard |
|
|
|
|
|
Click Finish to finish exporting file (Fig.6). |
|
|
|
|
|
Step 7 |
|
|
|
|
|
To import your Act! export file into Client Track, follow the instructions
here. |
|
