|
Before importing clients into Client Track, you must export your clients first.
Choose type of software from the left sidebar menu and follow the step-by-step tutorial
on how to export your clients and be ready to import into Client Track. |
|
|
|
|
|
Exporting your Clients from Microsoft Excel
into text/csv file. |
|
|
|
|
|
Step 1 |
|
|
|
|
|
 |
|
|
|
|
|
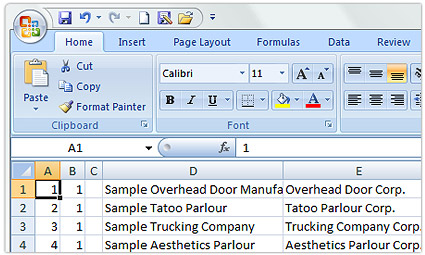
Fig.1. Excel File |
|
|
|
|
|
Open file that you want to export in Excel (Fig.1). |
|
|
|
|
|
Step 2 |
|
|
|
|
|
 |
|
|
|
|
|
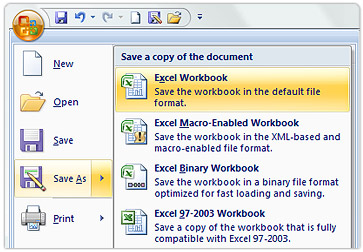
Fig.2. File Menu |
|
|
|
|
|
 |
|
From menu, go to
File > Save As
> Excel Workbook
(Fig.2). |
|
|
|
|
|
|
|
Step 3 |
|
|
|
|
|
 |
|
|
|
|
|
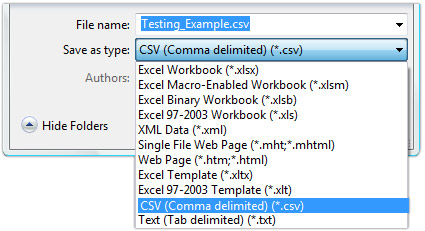
Fig.3. Export File Type |
|
|
|
|
|
Create export file name and select CSV (.csv) from drop-down list
(Fig.3). |
|
|
|
|
|
Step 4 |
|
|
|
|
|
 |
|
|
|
|
|
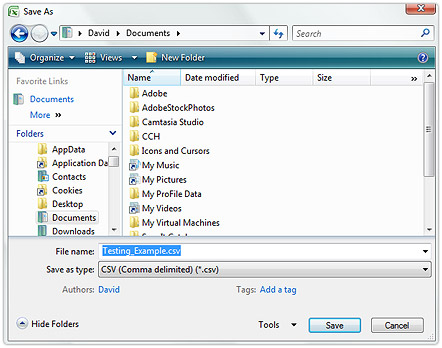
Fig.4. Save File |
|
|
|
|
|
Click Save (Fig.4). |
|
|
|
|
|
Step 5 |
|
|
|
|
|
To import your Excel export file into Client Track, follow the instructions
here. |
|

